Bell Home Hub 1000 Bridge Mode
Bell Home Hub 1000 Bridge Mode
[rank_math_breadcrumb]
Placing your Bell modem in bridge mode should always be done when possible if you are going to be using your own router. It helps avoid problems where the modem dials the PPPoE session at the same time as your router, which can cause the internet to be lost momentarily as they fight each other.
Not placing your modem in bridge mode properly can also cause other unintended consequences like poor performance, double NAT, extra DHCP servers or other issues. When using your own router, always put your modem in bridge mode when possible!
The Home Hub 1000 is actually the only Bell modem still in use that supports a true bridge mode so we often recommend downgrading to this model if possible when deploying a small business site as they tend to cause less PPPoE issues than the Home Hub 2000 and Home Hub 3000. There is a procedure for the other Home Hubs, but it’s a little different.
How to Enable Bridge Mode
Before starting this procedure, of course make sure that you have your PPPoE credentials written down somewhere so you can put them into your router before resetting the Bell modem!
Here’s is how to enable bridge mode:
- Go to 192.168.2.1 in your web browser.
- Log in with admin/admin.
- Click on the Wi-Fi settings button.
- Slide the Primary Wi-Fi network to the OFF position.
- Set the Guest setting to the OFF position.
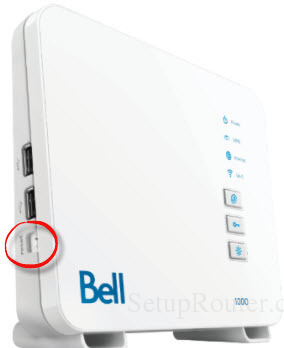
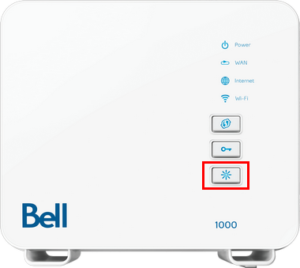
- Hold the brightnesss and reset buttons for 20 seconds (3rd button and reset button)
- The Power LED will turn purple to indicate it is in bridge mode.


And that’s it! Note that in bridge mode, you will no longer be able to access the web interface. In order to get the modem out of bridge mode, you will need to reset it. Hopefully this is helpful for anyone looking to factory reset a Home Hub 1000 modem!
Posted on November 21, 2019
